Email Reports
Email Reports allow you to attach a PDF and/or CSV attachment of a dashboard(s) to an email. The email can be scheduled to be sent at a chosen interval to single or multiple recipients.
To Create an Email Report:
1. Under Report Actions, select Send Email.
2. Enter the Email Subject that will be displayed.
3. Enter the Email address of the recipient(s). Comma-separated for multiple recipients.
4. You can optionally add the following:
-
Add Email From: Enter the email address from which the email will be sent. This address will reflect the sender of the email in the recipient’s inbox.
-
Add Reply To: Enter the email address to which any reply will be sent. Although optional, it is recommended to add an email address in this field.
-
Add CC: Enter the email address of recipients who’ll receive a copy of the email.
-
Add BCC: Enter the email address of the recipients that you want to hide from the primary recipient(s).
-
Embed Dash Image: In case of a report with one or more dashboards, embed the dashboard as an image directly into the mail by typing {EmbedDashboardImage} tag or clicking this link to insert tag in the current cursor position.
5. Write custom HTML to customize the email template (Optional).
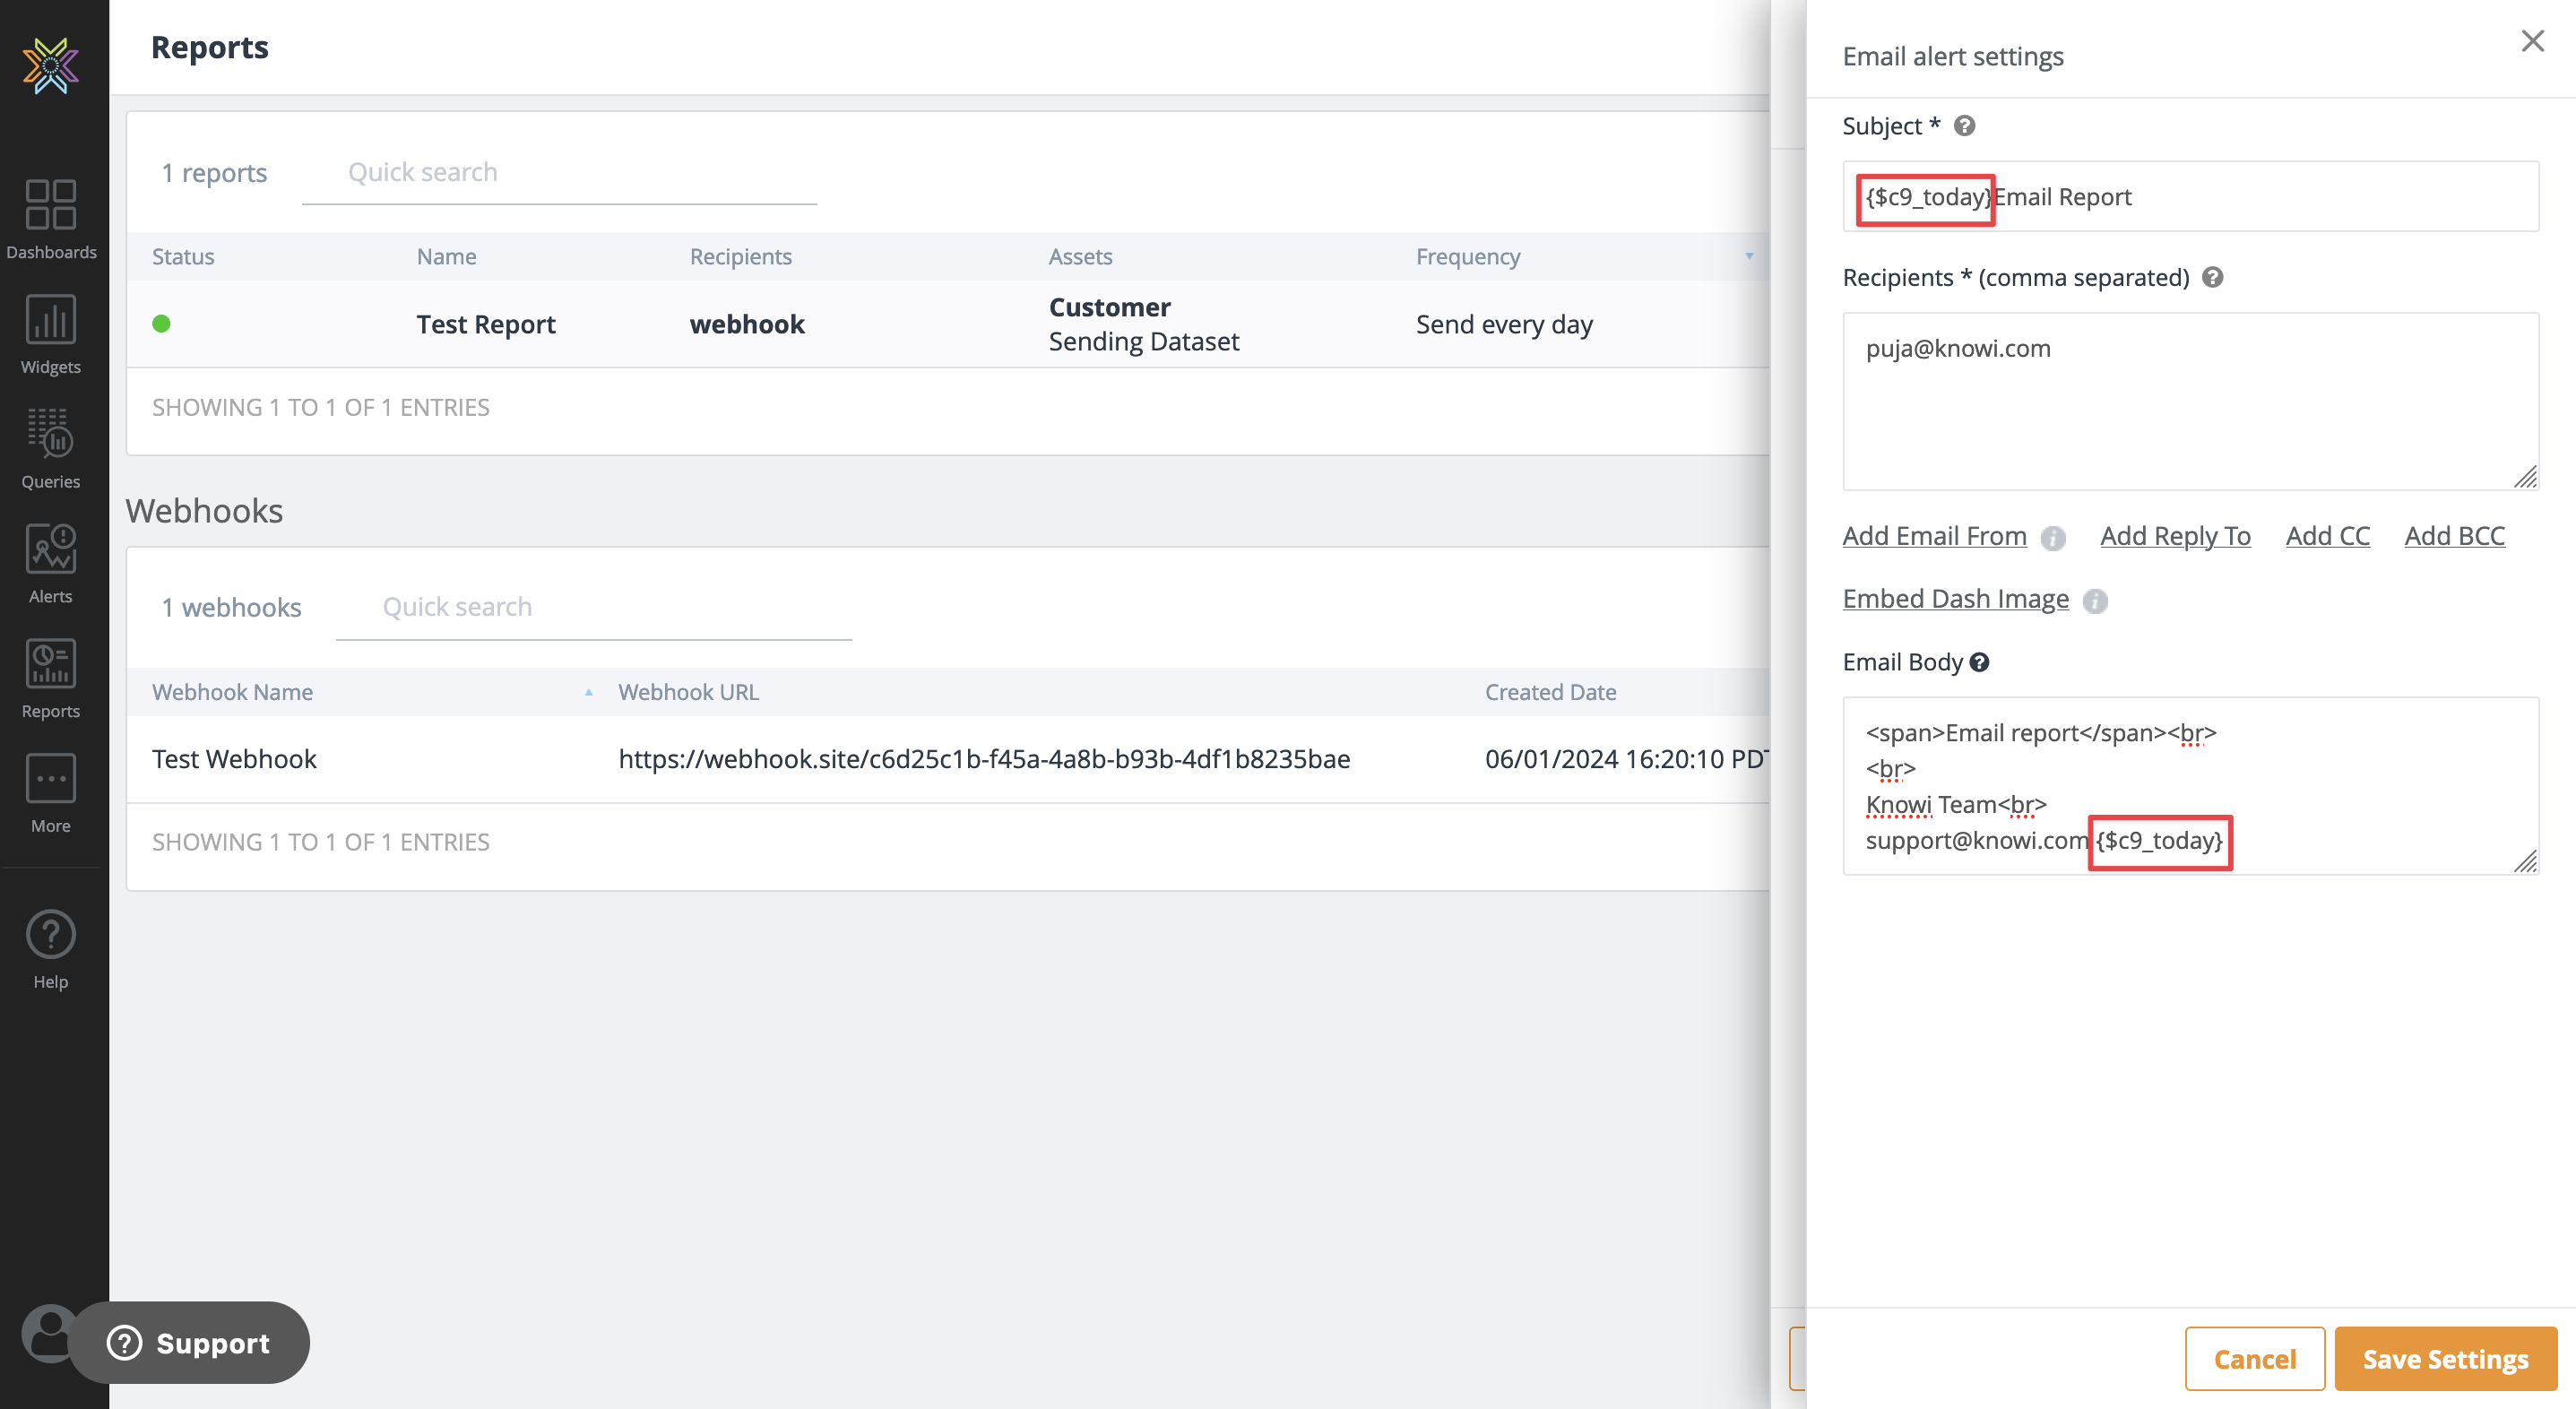
Below is an example of what a common setup looks like, customized for a particular use case.
Below is an example of what the actual email received in a specified account looks like:
Date Tokens Format
Users have the ability to specify the c9_date token in the email report subject and body in the following format:
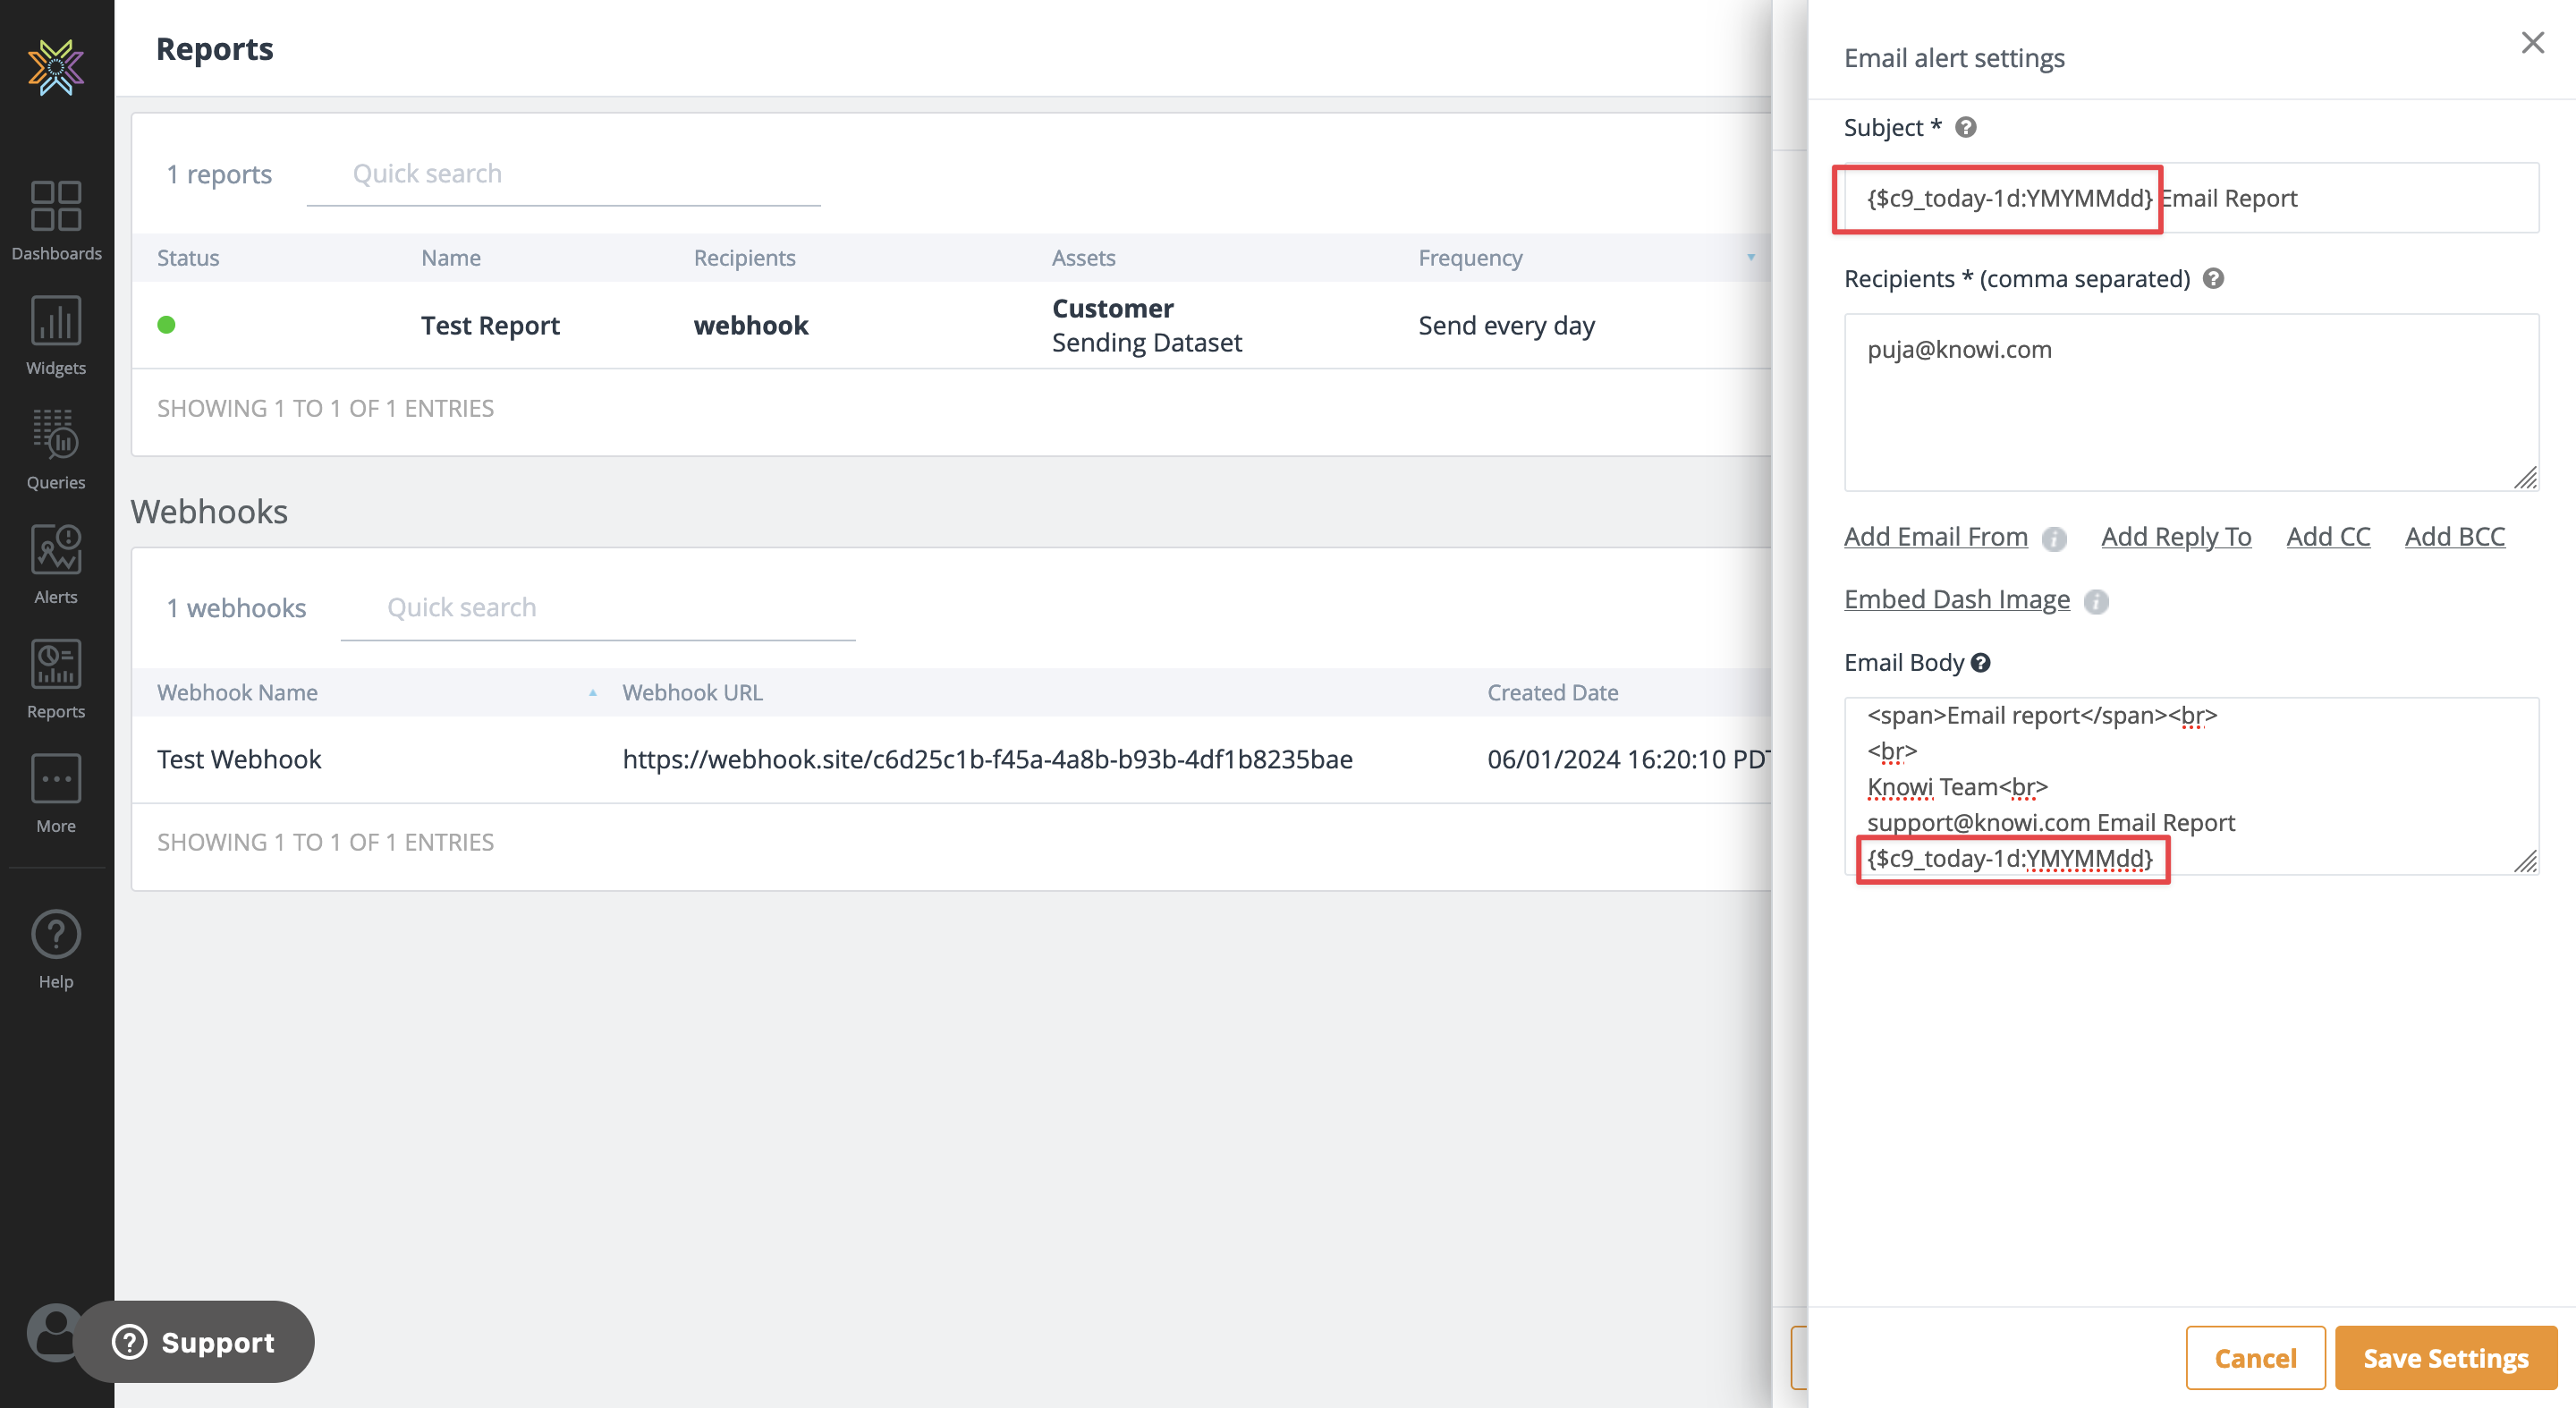
{$c9_<datetoken><op><number><timeunit>:YYYYMMdd}
For example, {$c9_today-1d:YYYYMMdd} will be translated automatically to yesterday”.
If the format is not specified (YYYYMMdd in the example above) - then the default user date-time format is applied.
For more information on supported date tokens and time units, you can refer to the Date Tokens section of our documentation.
Using Date Tokens in Email, Webhook, Slack and Teams
Date tokens can be used in emails, webhooks, Slack, and Teams.
In emails: subject and body.
In case of webhooks: URL to Invoke, Authentication URL, Headers, Auth Headers, and Custom POST body.
In Slack and Teams: Message.
Webhook Reports
Webhook Reports allow you to attach a PDF and/or CSV attachment of a dashboard(s) and send it to the endpoint of your own application. The endpoint should be able to accept multipart form data as the results are sent separately as files of different content. The CSV attachments can be attached as an attachment or JSON payload.
content-type of application/pdf for dashboard results;
content-type of text/csv for dataset results;
The following service provides you with free functional testing and validation facilities of the structure and content of the requests sent to your real endpoints.
To Create a Webhook Report:
1. Under Report Actions, select Webhook and click the Add New Webhook.
2. A Create New Webhook opens up in the right panel.
3. Under
Format dropdown, choose the format in which the email report datasets are sent to a webhook. Allows you to choose as an CSV file attachment or JSON payload.
The JSON payload follows the format as:
{"Dataset Name": [
{"id": 1, "customer": "Facebook", "region": "USA"},
{"id": 2, "customer": "Netflix", "region": "USA"},
{"id": 3, "customer": "Amazon", "region": "USA"}
1]}
4. Under Name, enter the name of the webhook.
5. Under URL to Invoke enter the endpoint in your application to invoke that can accept a POST request with JSON (array of objects).
6. Under the Authentication URL, enter the authentication endpoint to get a token, which can be passed into each subsequent query. Only required if the API requires it, which is an absolute URL.
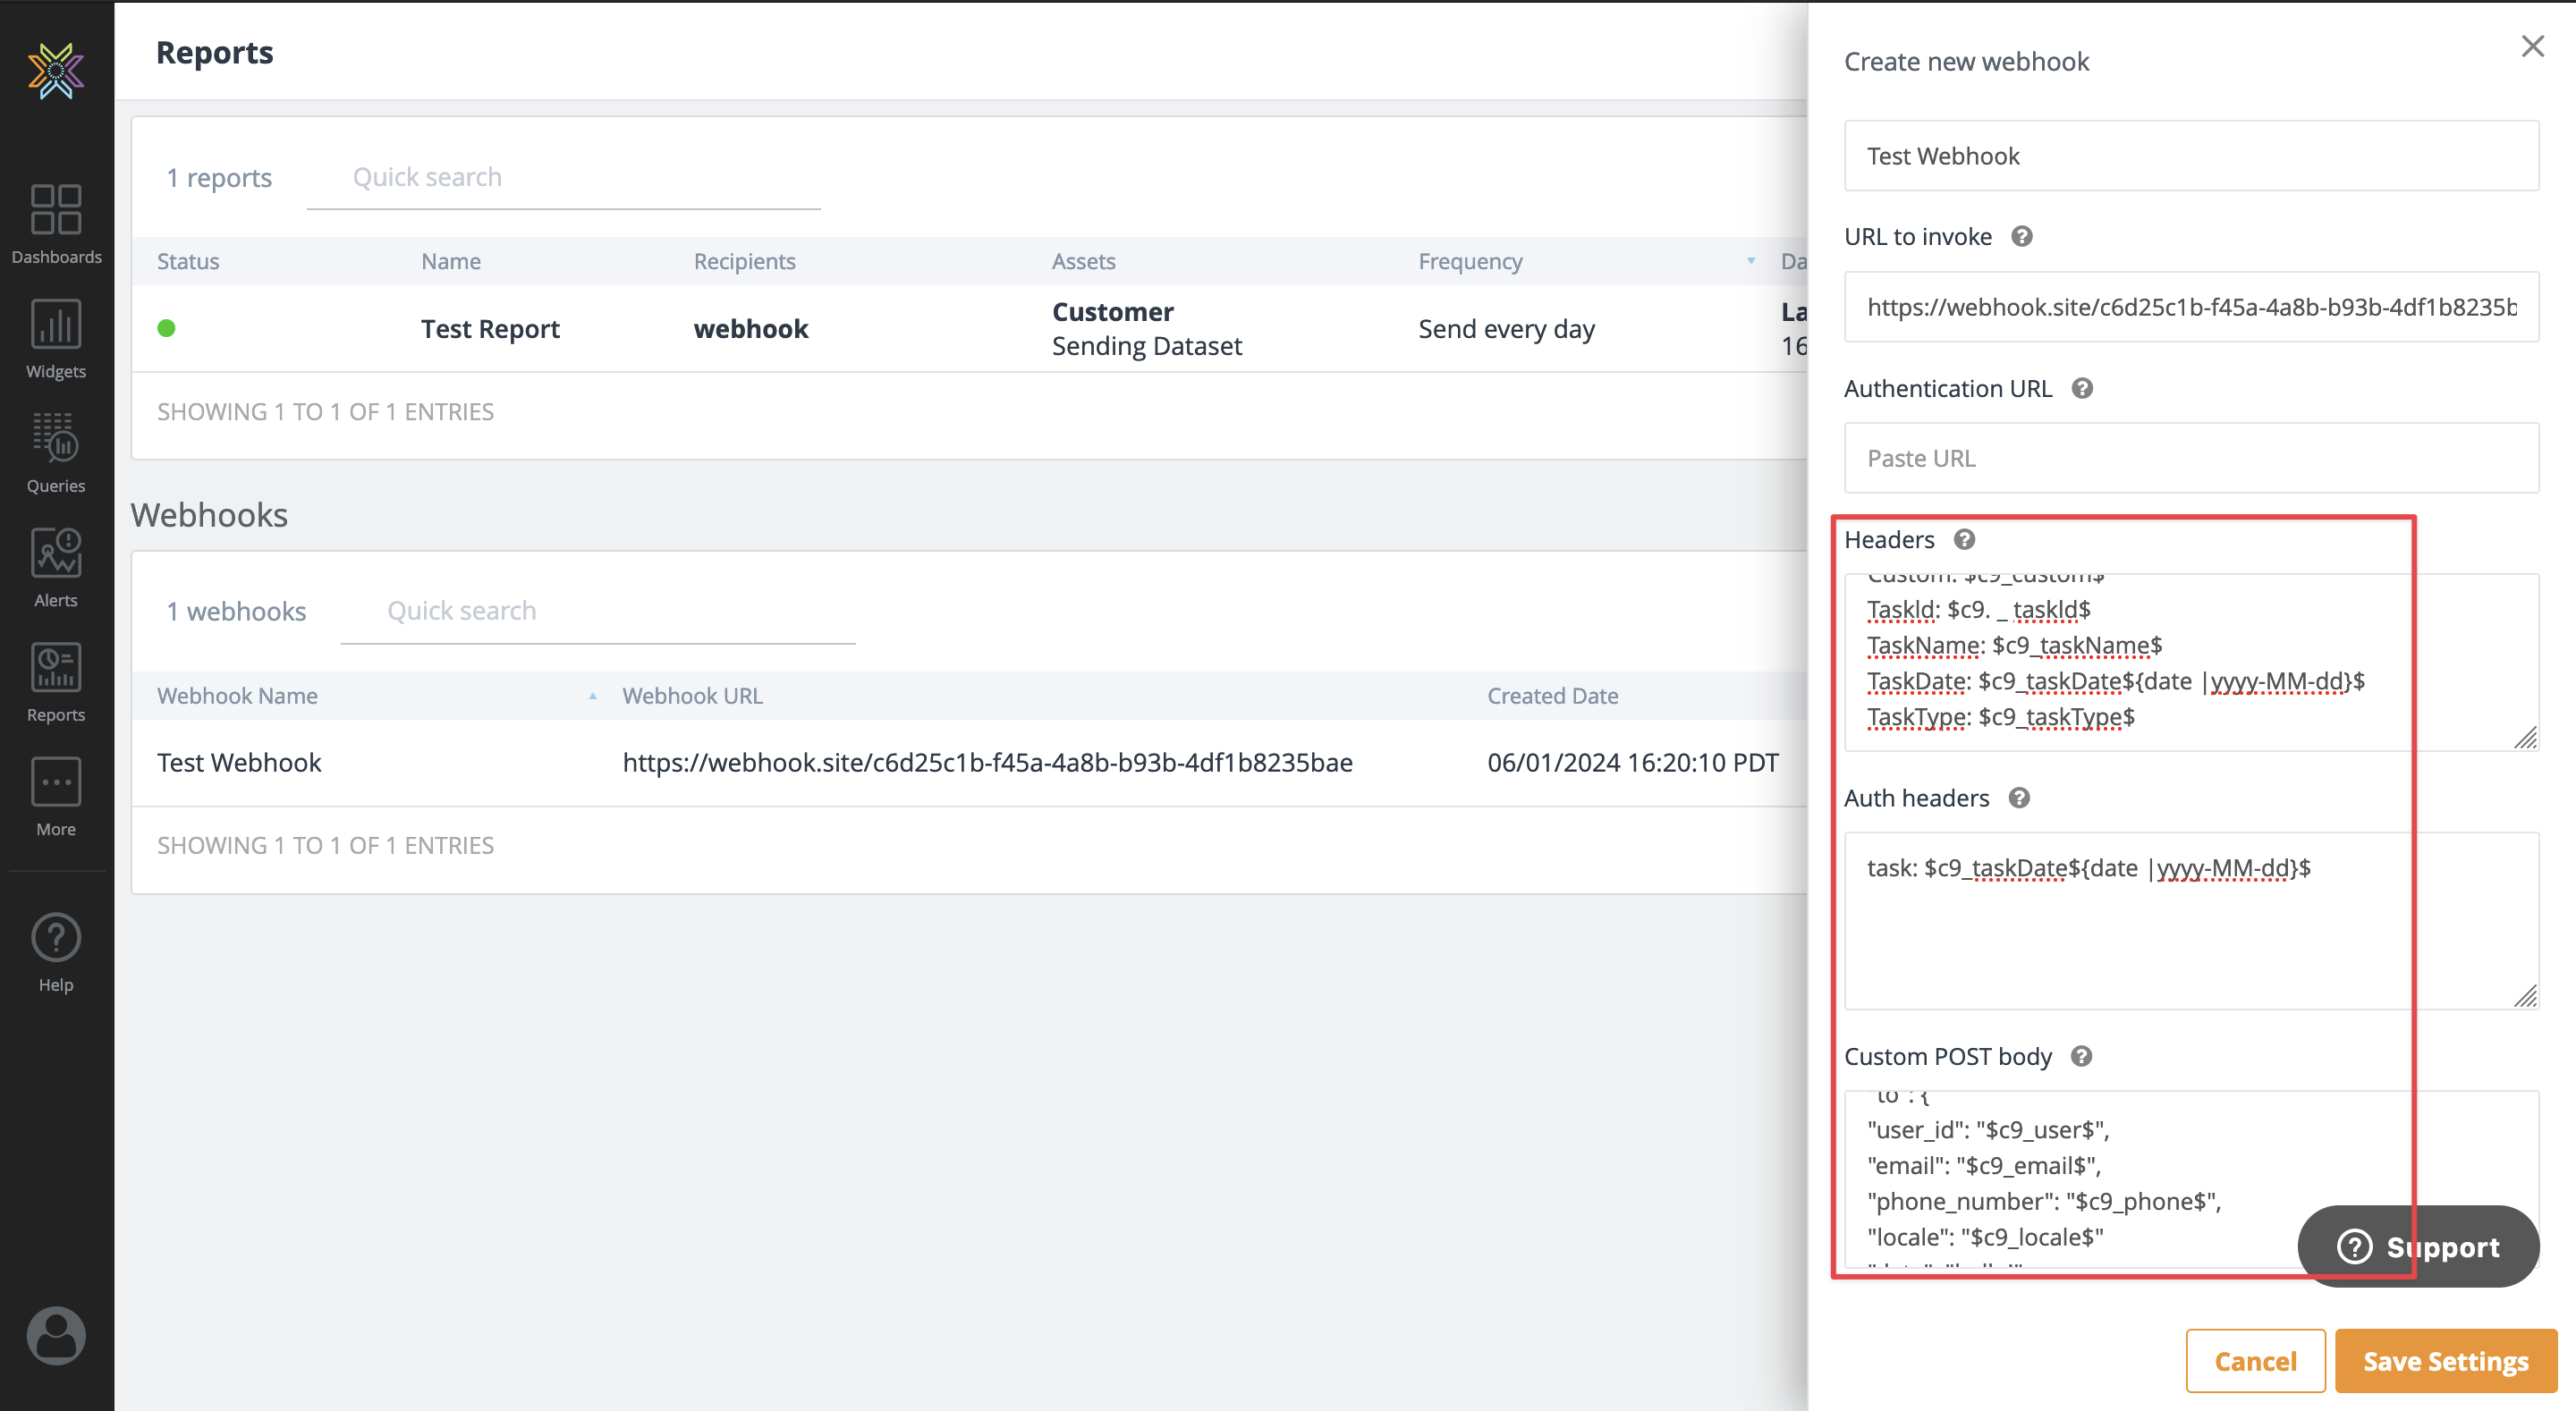
7. Under
Headers, enter any headers for HTTP requests to the “URL to Invoke” endpoint. There can be one header per line.
Knowi also provides the following C9 tokens which can be used to identify the report on the Webhook headers.
-
$c9_taskDate$: It denotes the date of the report in the (yyyy-mm-dd) format
-
$c9_taskName$: It defines the name of the webhook report. For example: Test webhook
-
$c9_taskId$: It denotes any Id of the report. For example: 2971
-
$c9_taskType$: This can be either “report” or “alert”
8. Under Auth Headers, enter any optional authentication-related headers. One Header per line.
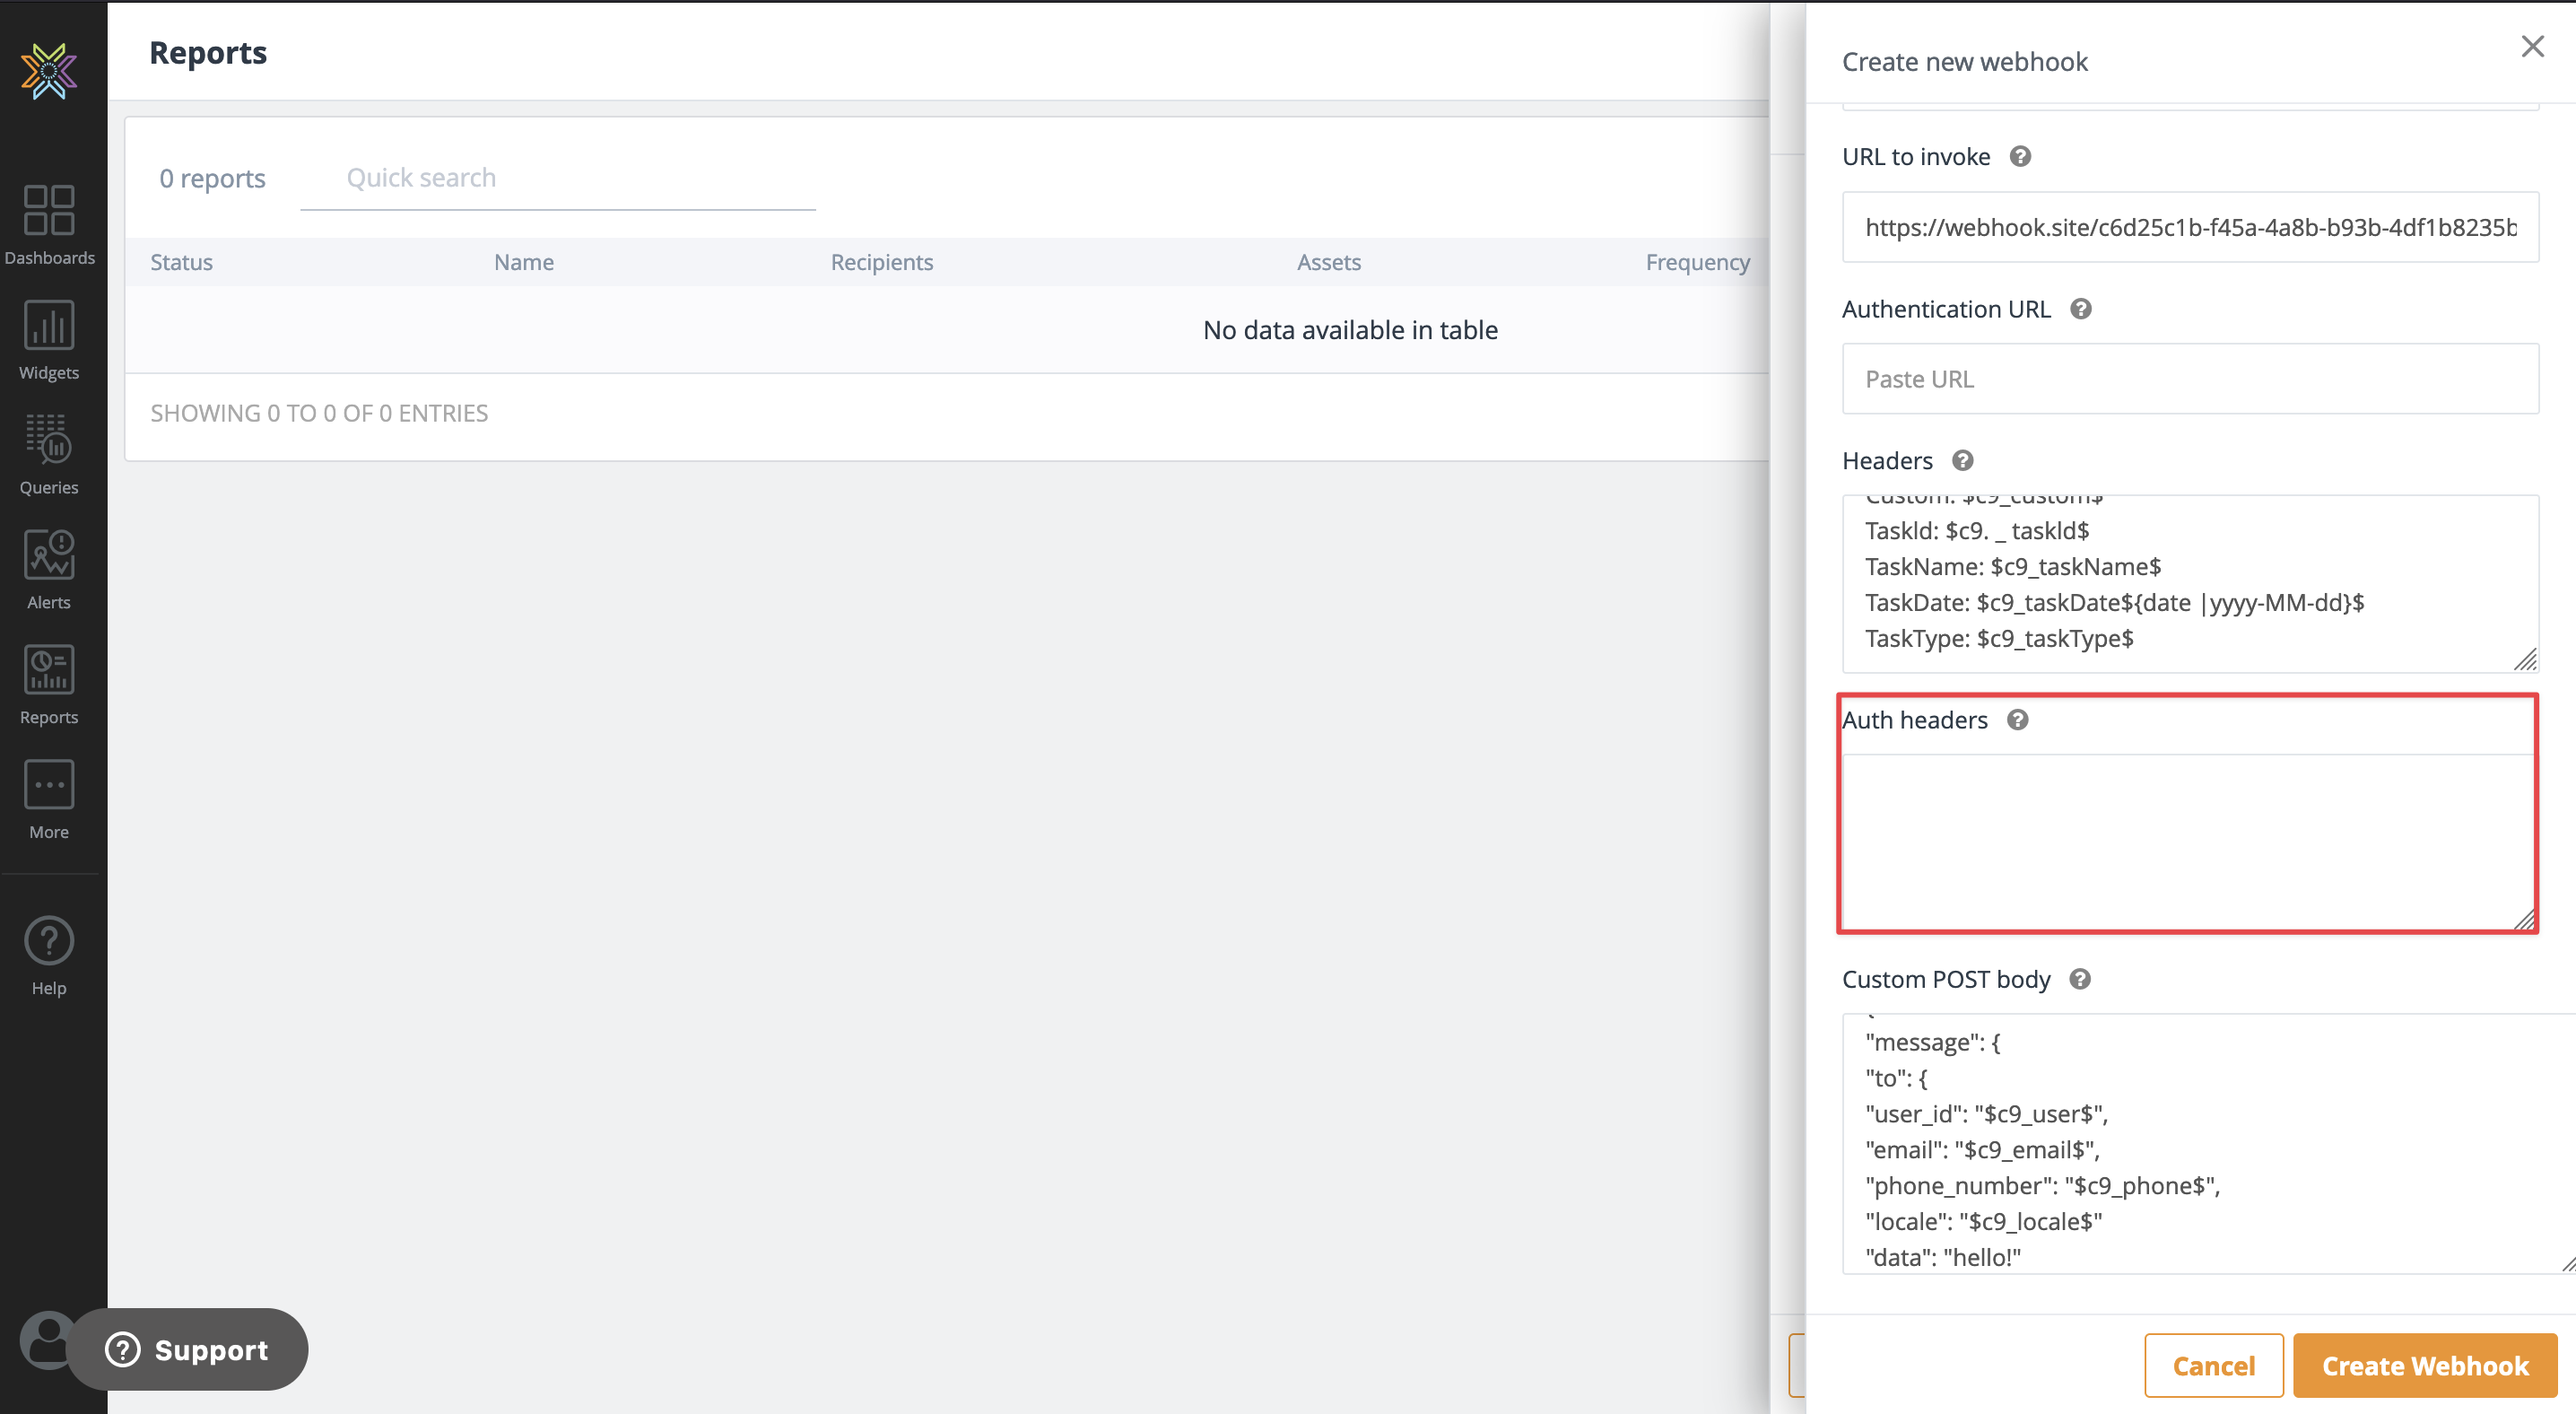
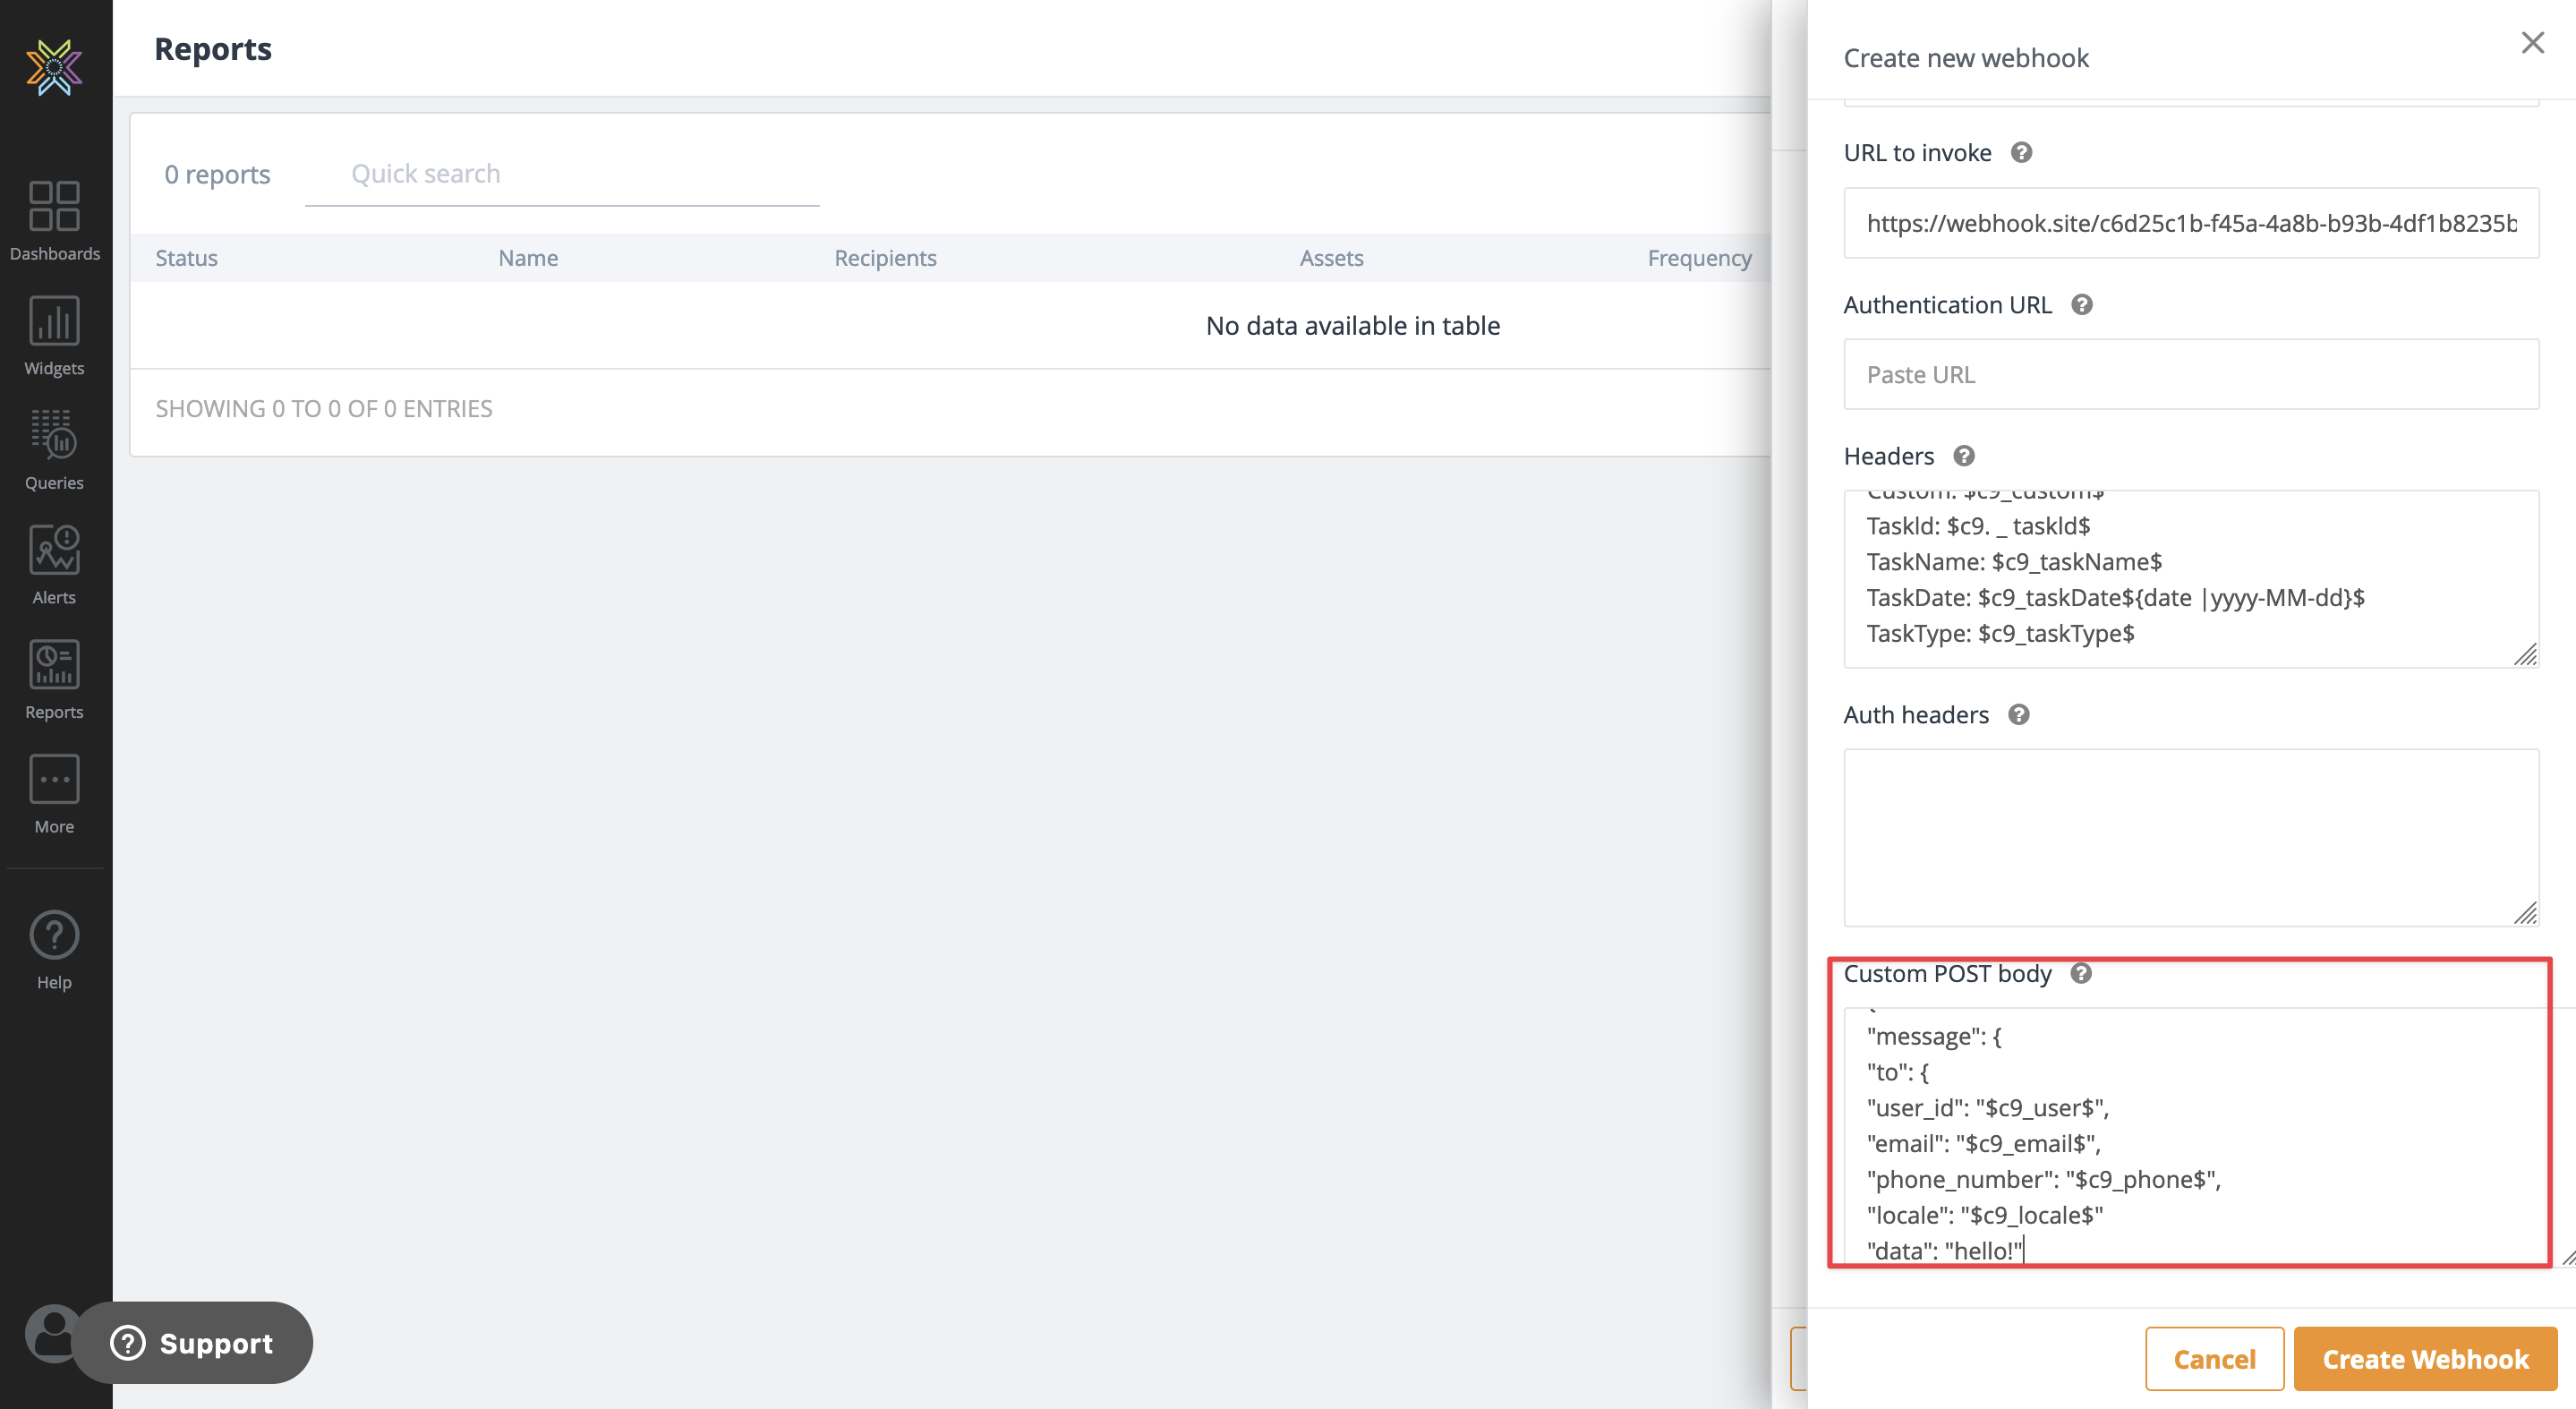
9. Under the
Custom POST Body, the user can pass data tokens through the webhook using the POST Body field. Enter a custom post body to be sent out. Data tokens can pass field values from data. If left empty, the post body for the webhook will contain the conditional data saved as JSON or just a default message with the dataset name triggered.
For example,
For sending activity samples, we can type %opened% or %customer%, etc., and it will be replaced with the value of the fields of the first row of triggered data.
Note: The data of token only can pass first record of triggered alert/report data (or conditional data alerted)
10. Click Create Webhook.
Below is an example of the webhook report that is produced based on the values defined.
Reference code sample
here.
Slack Reports
Slack Reports allow you to attach a PDF and/or CSV attachment of a dashboard(s) to a list of public channels on your team’s Slack workspace including an alert message.
To Create a Slack Report:
1. Under Report Actions, select Slack.
2. Click + Add New Slack Account to open the Add Slack window. Click Allow to connect to your Slack channel.
3. Under Slack Name, give your report a name that it will be displayed as.
4. Under Slack Message, enter a user-defined message that will be posted to Slack. Leaving blank will post a default message.
5. Under Slack Team, enter the Slack team you want to publish notifications.
6. In the Slack Channels dropdown, select the Slack channel(s) and the alert notification and the report will be published.
Below is an example of what the common setup looks like:
Below is an example of the results that are actually sent and published to the specified Slack channel(s)
Teams Reports
Similar to Slack reports, you can also send the reports and events into your Microsoft Teams channels or group chats for triggered conditions. Start creating the Teams report by selecting the Teams under Report Actions and clicking on the +Add Teams button.